
Reports
This chapter covers Terrace's reports: one dialog with every report as a live table, from point lists to earthwork, pipes and technical descriptions, plus the quick report commands. By the end you'll be able to preview any report on your project and save it as CSV for a spreadsheet or as a PDF to print and attach.
Opening the Reports dialog
Every report is in one dialog, and you can reach it from wherever you are:
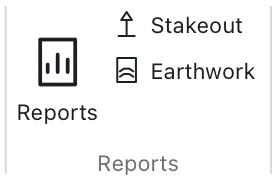
- Sheets ▸ Reports on the ribbon, or type
REPORT(aliasesREPORTS,CIVILREPORT). - The Reports… button in the Next step panel once the road is designed.
- The Report… button at the top of an object's Properties, or Report… in an object's menu (⋯) in the Project browser.
- Surfaces ▸ Surface Report, and Report on the contextual tab of a selected alignment, profile, corridor or surface.
- The command palette (⌘K): type "reports".
When an object is selected (or you start from its Properties), the dialog opens on the first report about that kind of object: Alignment geometry for an alignment, Earthwork volumes for a sample line group, Pipes for a pipe network, Parcel areas for a parcel site. With nothing selected it opens on the Point list.
The dialog
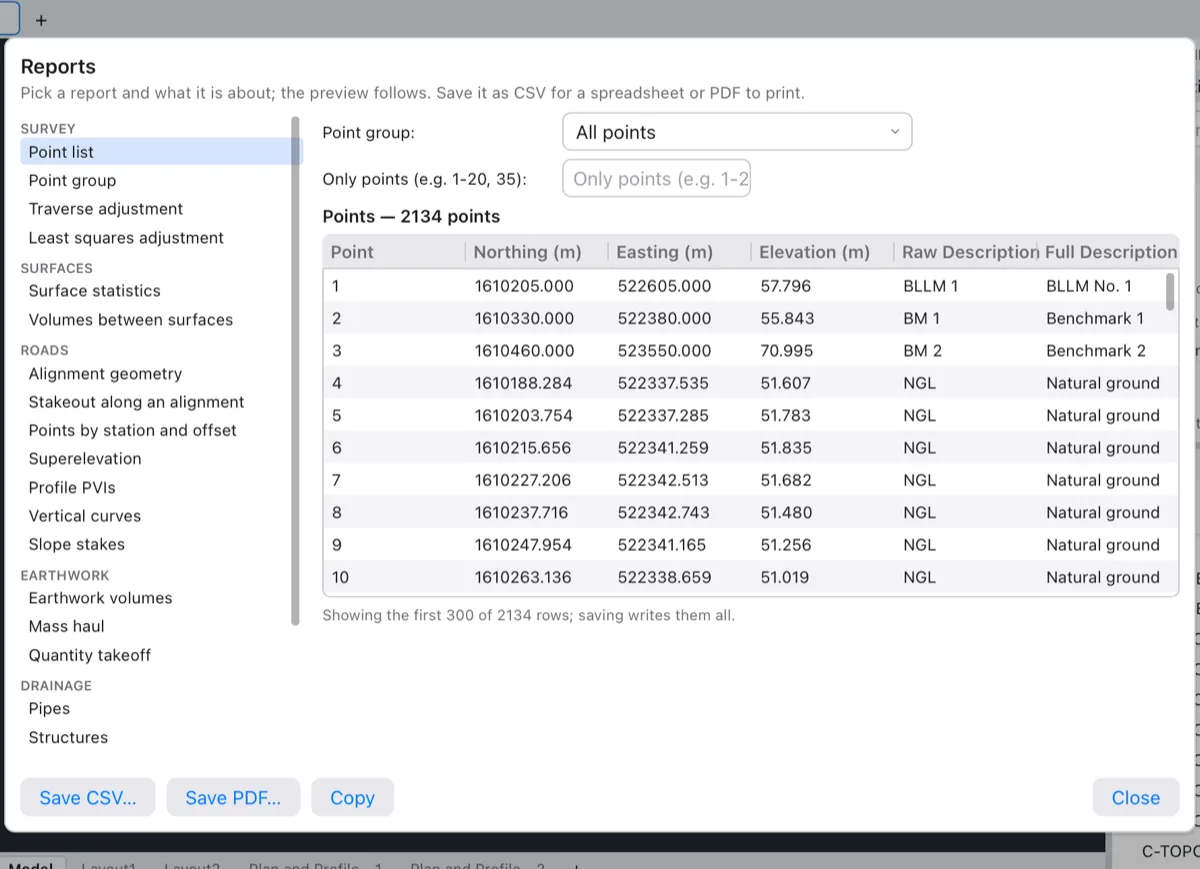
- Pick a report in the list on the left. Reports are grouped by task: Survey, Surfaces, Roads, Earthwork, Drainage and Parcels (scroll the list for the last groups).
- Pick what it's about in the first field: the alignment, profile, surface, sample line group, pipe network or parcel site. The first object of the right kind is chosen for you.
- Set the options, if the report has any (see the table below).
- Read the preview. It follows every change at once: the report's title, the table (the first 300 rows; saving writes them all), the row count, and the report's notes below it.
- Save or copy:
- Save CSV… writes the table as a CSV file for Excel or another spreadsheet.
- Save PDF… writes a printable PDF (see PDF reports).
- Copy puts the report on the clipboard as plain text with aligned columns and its notes, ready to paste into an email or a document.
Files are named after the report, for example Technical Description - Lot 3 · San Roque Lots.pdf. A line under the preview confirms each save.
A report reads the project as it is now: change the design, open the dialog again, and the numbers follow.
Every report
| Group | Report | About | What it shows | Options |
|---|---|---|---|---|
| Survey | Point list | Point group, or all points | Point number, northing, easting, elevation, raw and full description | Only points: ranges like 1-20, 35 |
| Point group | Point group | The group's points, as in the point list, with the group's description | — | |
| Traverse adjustment | — | The project's first traverse: adjusted coordinates of its stations, misclosure and precision | — | |
| Least squares adjustment | — | Adjusted coordinates with their standard errors (σ N, σ E) and error ellipses | — | |
| Surfaces | Surface statistics | Surface | Points, triangles, area, elevation range, slopes | — |
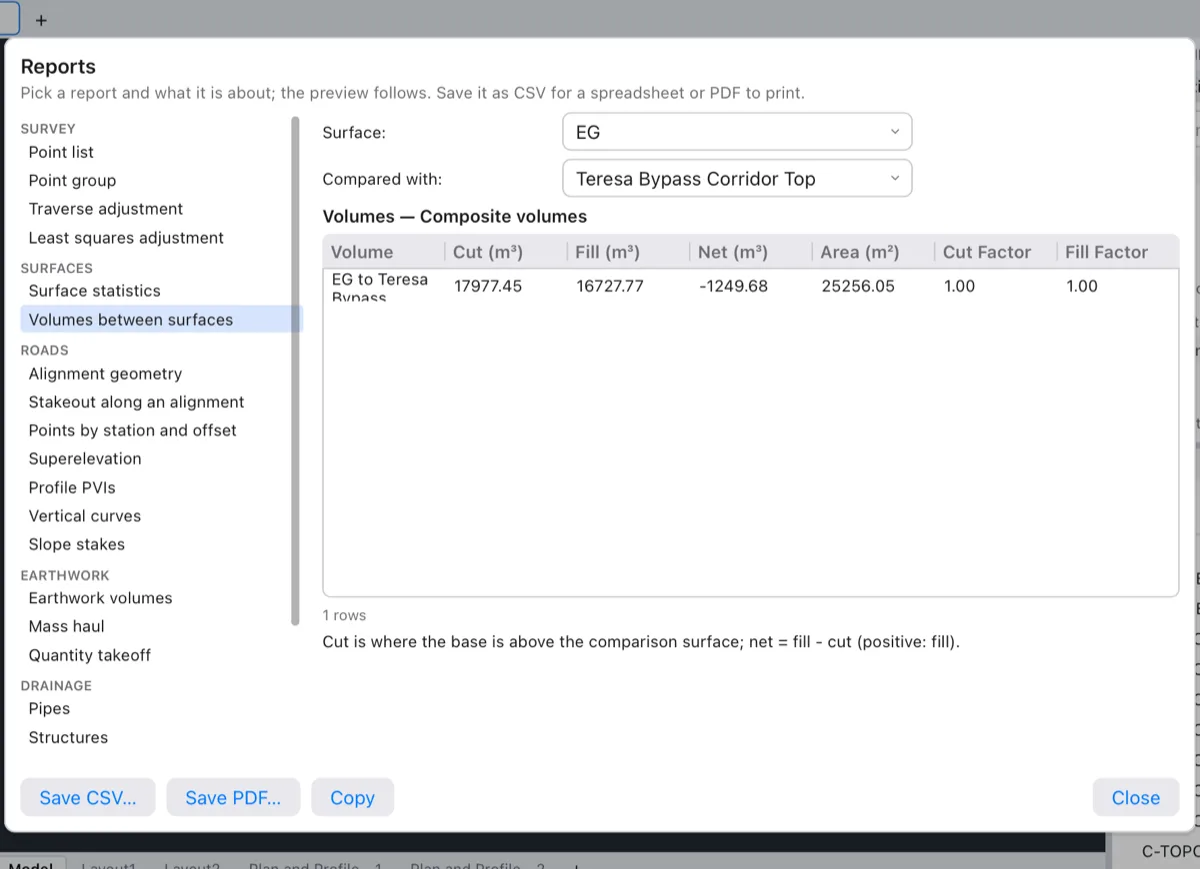
| Volumes between surfaces | Surface | Cut, fill and net volume and area between two surfaces, with cut and fill factors | Compared with: the other surface | |
| Roads | Alignment geometry | Alignment | Each tangent, spiral and curve: stations, length, radius, direction, start and end coordinates; the key points (TS, SC, CS, ST…) and superelevation stations in the notes | — |
| Stakeout along an alignment | Alignment | Station, offset, side, northing, easting and design elevation for setting out | Every (20 m; 50 ft in US projects), Offsets (− left, + right), Also at geometry points (PC, PT…) | |
| Points by station and offset | Alignment | Each COGO point's station, offset and side from the alignment | Only points | |
| Superelevation | Alignment | For each curve, the stations of normal crown, level crown, reverse crown and full super, the rate and widening; emax and design speed in the notes | — | |
| Profile PVIs | Profile | Each PVI (point of vertical intersection): station, elevation, grades in and out, A (grade change), curve length and K | — | |
| Vertical curves | Profile | Each vertical curve: PVC, PVI and PVT stations and elevations, length, grades, A, K, and the high or low point | — | |
| Slope stakes | Corridor | At each station and side, the catch point (where the cut or fill slope meets the ground) and the other feature points: offset, elevation, distance from the centerline, coordinates | — | |
| Earthwork | Earthwork volumes | Sample line group | At each station, the cut, fill and material areas, the volumes between stations, the cumulative volumes and the mass ordinate | — |
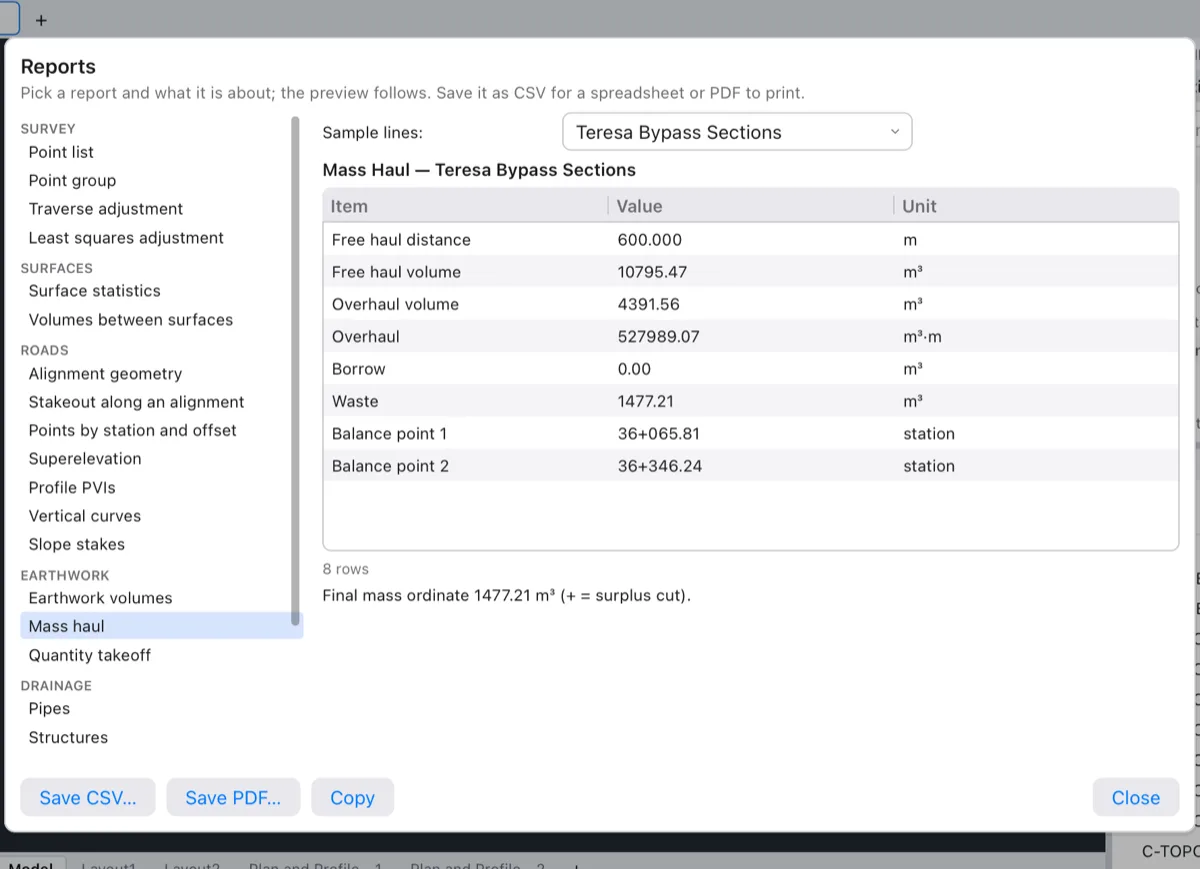
| Mass haul | Sample line group | Free haul distance and volume, overhaul, borrow, waste, balance points, borrow pits and dump sites | — | |
| Quantity takeoff | Sample line group | DPWH pay items with description, unit and quantity: Item 102 excavation, 104 embankment, 105 subgrade preparation, 107 overhaul, 200 aggregate subbase, 311 PCC pavement… | — | |
| Drainage | Pipes | Pipe network | Each pipe: from and to structures, size, material, length, slope, inverts, design flow, capacity, velocity, depth and HGL (hydraulic grade line) at both ends | — |
| Structures | Pipe network | Each structure: part, coordinates, station and offset, rim, invert, depth, sump, HGL in and out | — | |
| Catchments | Pipe network | Each catchment: area, runoff coefficient C, time of concentration Tc and its method, the structure it drains to | — | |
| Parcels | Parcel areas | Parcel site | Each lot's number, name, kind, area and perimeter, with the total | — |
| Technical description | Parcel site | A lot's courses and its technical description in the Philippine form (see Parcels) | Lot number, Format | |
| Lot data computation | Parcel site | A lot's tie line and courses with latitudes, departures and coordinates, and its closure | Lot number |
A few of them on the sample project:
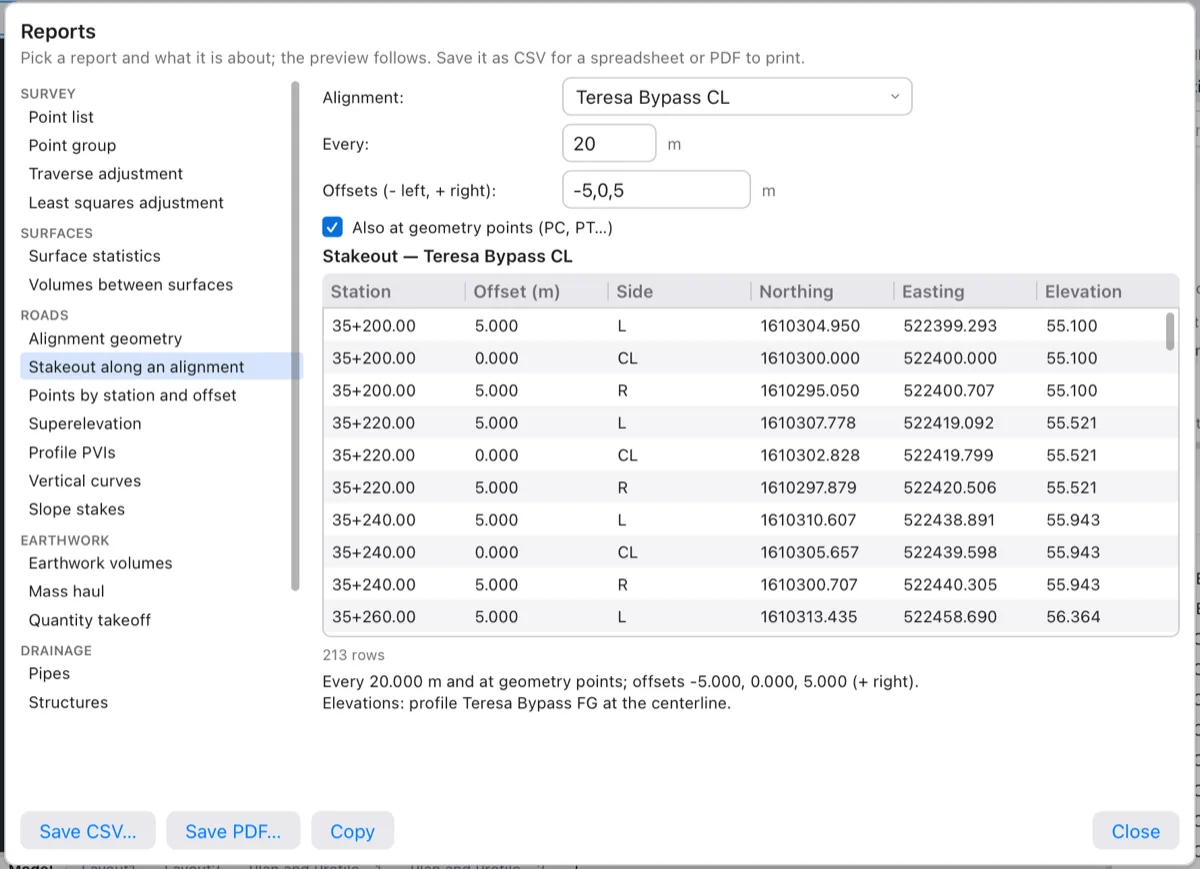
In the stakeout, the side reads L, CL or R and offsets are shown without a sign. Elevations are the design profile's at the centerline, as the note under the table says.
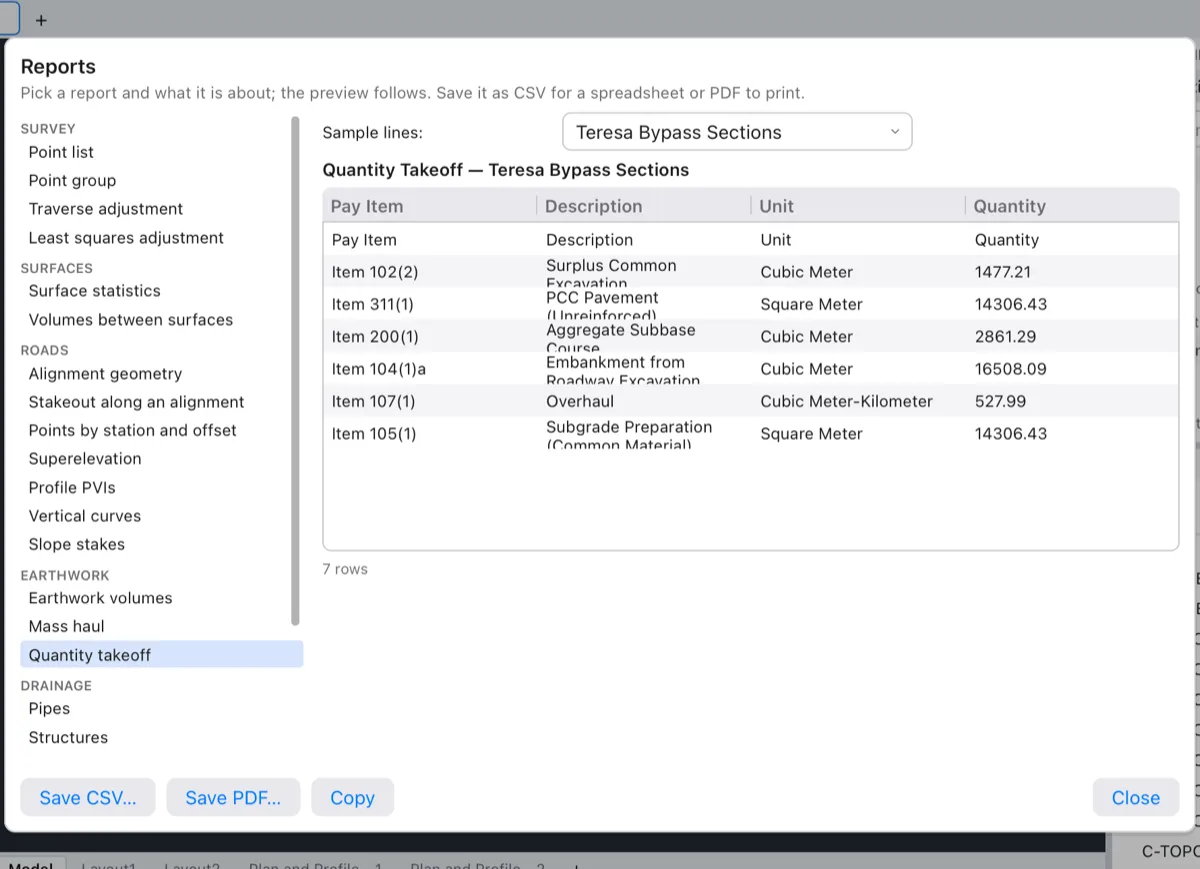
The quantity takeoff currently repeats its column headings as the first row of the table; skip that row when you paste it into a bill of quantities.
Quick report commands
For the reports you run most, a command asks for the object, prints the report on the command line (up to 66 lines; the rest is in the dialog) and then opens the Reports dialog. The command line is handy for a quick look while you design.
| Command (aliases) | Asks for | Prints |
|---|---|---|
STAKEOUT (STAKE), also Sheets ▸ Stakeout | The alignment; Station interval <20>; Offsets (comma-separated, + right) <0>, such as -5,0,5 | Stakeout along the alignment |
EARTHWORKREPORT (VOLREPORT), also Sheets ▸ Earthwork | The sample line group | Earthwork volumes |
PIPEREPORT | The pipe network | Pipes |
STRUCTUREREPORT | The pipe network | Structures |
ALIGNMENTREPORT (ALREPORT) | The alignment | Alignment geometry |
AREATABLE (PARCELREPORT) | The parcel site | Parcel areas |
LOTDATA (LDC) | A click inside the lot | Lot data computation |
TECHDESC (TD) | A click inside the lot | The technical description |
At each object prompt, press Enter for the object shown, click one, or type its name. The stakeout interval and offsets are remembered for next time.
Note For now the dialog these commands open shows the first report for the object (for example Alignment geometry after STAKEOUT, Parcel areas after LOTDATA), not the one you asked for. Pick the report in the list and set its options again to save it.
The full list is in the command reference.
PDF reports
Save PDF… lays the report out on A4 pages, portrait, or landscape when the table is wide. Each page has:
- a header with the project name and number, and the client and location from Project Settings, with the report's name on the right;
- the report's title and subtitle (what it's about);
- the table, with numbers right-aligned and the headings repeated on every page; a wide table is fitted to the page width: its headings wrap onto several lines, then the type gets smaller (not below 6.5 pt), then long text wraps in its cell, and a table still too wide is printed in groups of columns, one after another, each with the first column (station, point, pipe…) again;
- the notes after the table;
- a footer with the date and Page 1 of 2.
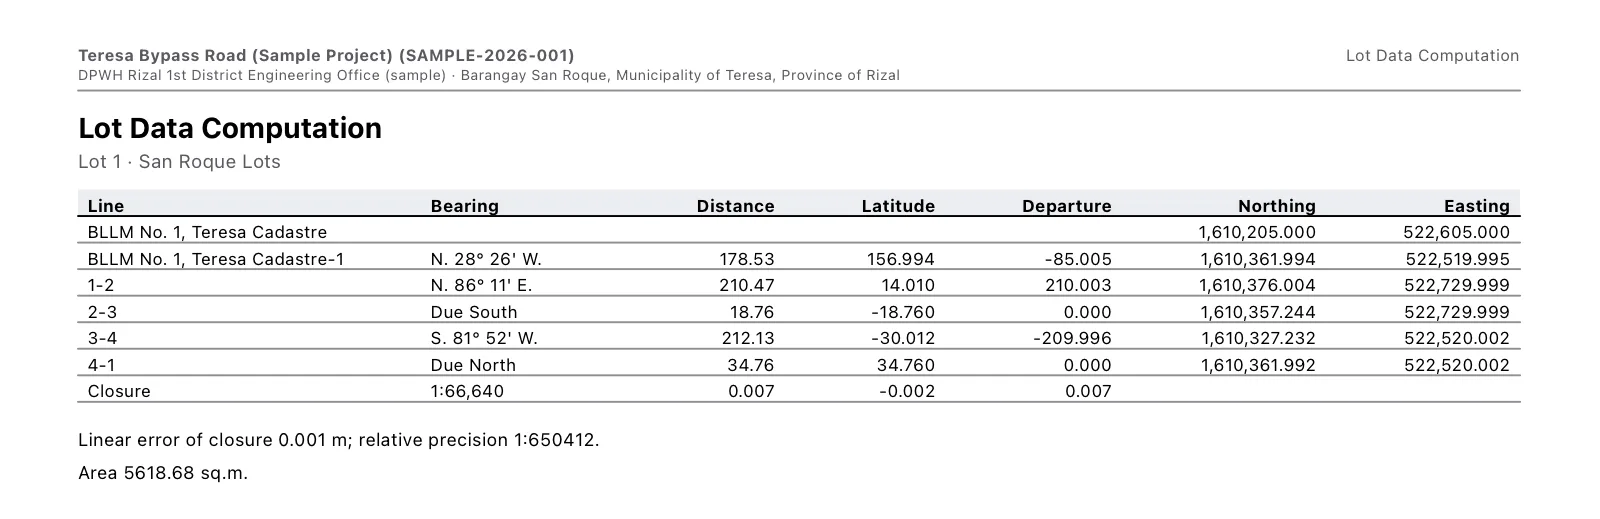
For a technical description saved as PDF, see Parcels.
CSV and copying
The CSV file holds the table: a heading row, then one row per table row, with numbers as shown in the preview (the project's decimals). A report that has no table, such as an empty one, saves its notes instead. Open it in Excel, LibreOffice or Google Sheets.
Copy is the quickest way to get a report into another document: it copies the title, the table as aligned columns of text, and the notes.
Numbers follow Project Settings: units, decimals for distances, elevations, areas and volumes, the station format (35+200.00) and how directions are written. Change them there and every report follows. See Projects and files.